
Put a few drops of your favorite essential oils on this super cute easy diy essential oil car charm scent diffuser for a great refreshing car scent that is healthy and helpful to your entire family!
This diffuser is a perfect gift for all of your essential oil loving friends! These car charms are a cute decoration but also a great way to diffuse your oils in your car.
I love my van to smell good as I’m sure you do as well. These car charms are a great natural alternative to commercial air fresheners that I know I have used for years!
If you want to enjoy the benefits of essential oils in a smaller space without using a plug-in diffuser then this essential oil diffuser is great for you!
How do you make an essential oil diffuser for a car?
You can let your creative juices start to flow for this fun project. You can go simple and basic or you can make your car charm diffuser colorful and bold, whatever fits your style!
This is a cute craft and easy way to get those creative juices flowing with your friends or your kiddos.
Check out some of my other DIY’s here-
You can hang these diffusers anywhere, they don’t have to just be used hanging on your rear view mirror. You can use them as a key chain, on your back pack, or hanging in any space.
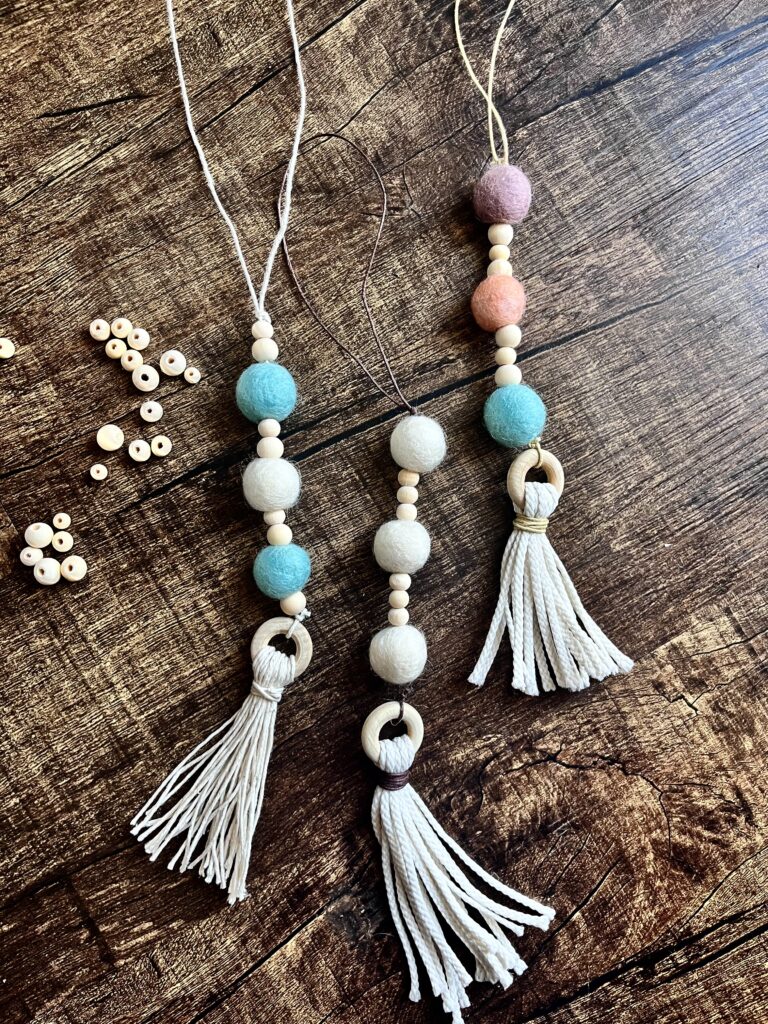
Instead of using basic felt circles, cotton balls or a felt pad to put your favorite essential oil blend on, you can use these cute diy charms made from felt balls and wooden beads instead!
What do you need to make an Easy Essential Oil Car Charm Scent Diffuser?
You are going to need just a few supplies for this fun project

- String, cord, rope of some kind- I used braiding hemp cord for the top part and a thicker craft cord for the tassel.
- Wooden beads- any size or shape. Just have to make sure that the hole is big enough to put your cord or string through
- Felt Balls- I used wool/felt balls. Any size and color is fine. Think of these as your reusable scent pads
- A large needle- I used a large plastic canvas needle
- Scissors
- High quality Natural essential oil
Linked below are the items you need from amazon to make this project:
Step -by-Step on how to make your own essential oil diffuser for your car:
- Cut a 12 inch piece of your cord
- Tie a loop at the top of your cord, this will be used to hang on whatever you choose.
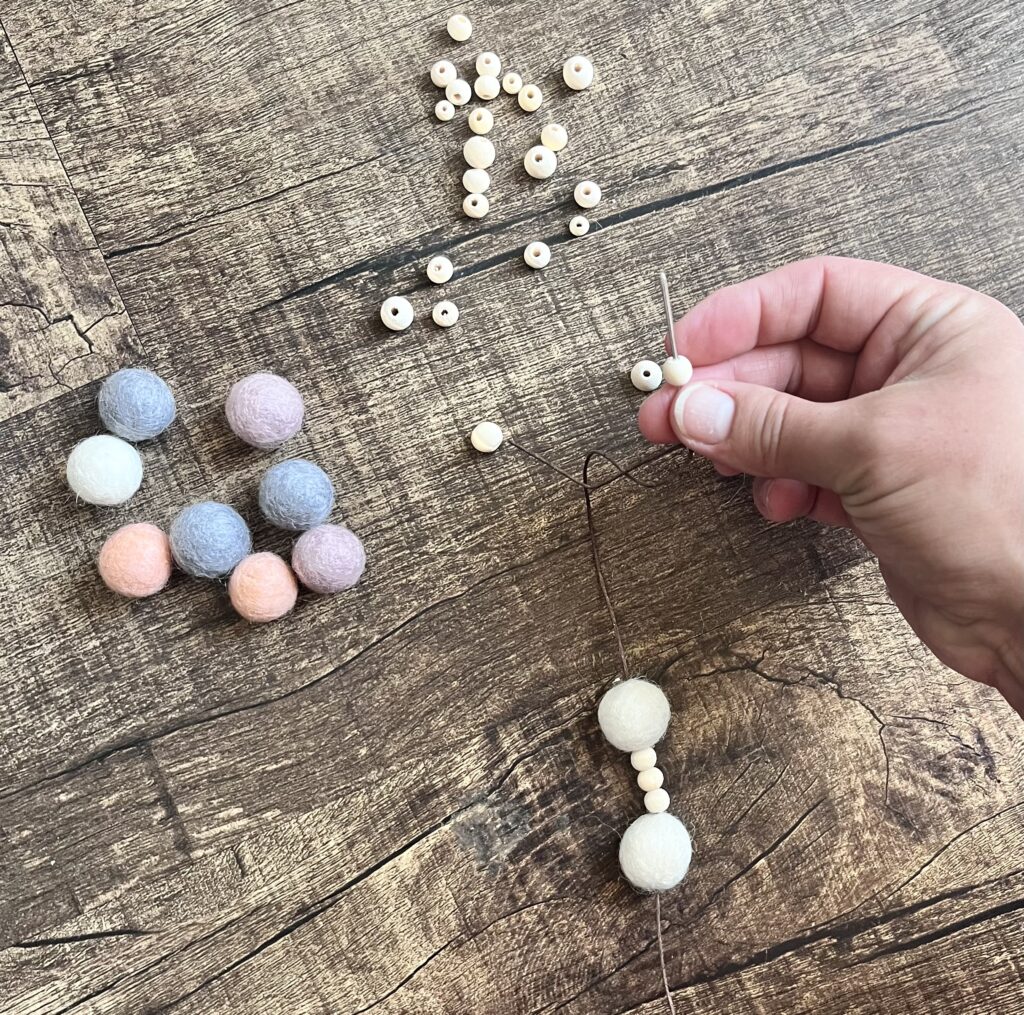
- Thread the other end of the string through the needle, no need to tie it. We are just using the needle to thread the cord through our felt balls and beads
- Start stringing your felt balls and beads together in whatever pattern you like
Now let’s make the tassel:

- Grab another piece of cord or rope that is about 10 Feet long (the longer the cord the thicker the tassel will be)
- Start wrapping around your fingers until you have wrapped it all up into a loop
- Next, take another string that is about 12-15 inches long
- Fold this string in half and place it towards the top of your loop of cord with both ends pointing up
- With one of the ends of your string start wrapping around the top, include the other string into the group with the other cord.
- Once you have used up the string by wrapping it around, slip that end through the loop you made that is bellow the wrapping.
- Tug on the top part of the string and this will creat a hidden knot, pull both ends tightly
- Trim off both ends so it looks tighty
- Cut the bottom of your loop of cord so that the bottom is all even.
Now attach your tassel to the rest of your charm

Using your needle, thread the bottom part of your string through the tassel and tie a knot.
If you are using a wooden hoop like I did, you will need to cut the bottom of your cord and thread it through the wooden loop before you start tying the tassel.
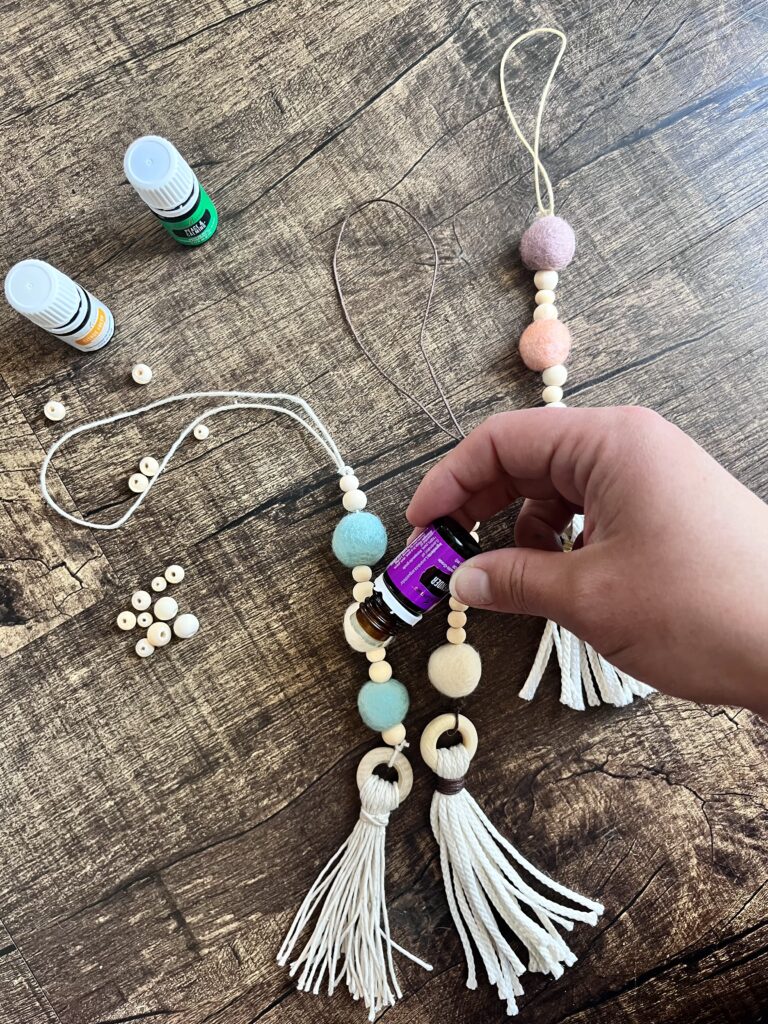
Once you have completed this project you are ready to put a few drops of your favorite essential oils onto the felt balls. You can even put some on the wooden beads as well.
What type of essential oils do you use for a car diffuser?
This is completely up to you and depends on what you are hoping to get from using the oils.
Some of the commonly used oils for diffusing are :
Lavender essential oil- better sleep
Peppermint- reduce headaches
Lemon essential oil- improves concentration
Citrus Blends of essential oils- improves mood
Eucalyptus -Clear sinuses
Chamomile- Reduce stress
How to use your Car Charm Essential Oil Diffuser
These are just a few of the many types of oils you can use on your easy Diy essential oil car charm scent diffuser.
Once the scent starts to wear off just add a few more drops of oil to refresh the essential oil pads.
Remember, if you are using an oil that is not clear and light colored felt balls, it might color your felt balls a little bit.
Essential oil are natural concentrated extractions from plants and are used not only for their beautiful scents, but also for their many health benefits. Some of those include:
Pain relief
Reducing stress
Boosting mood
Improving sleep
Reducing anxiety
Relieving headaches
Allergy relief
Killing bacteria, funguses and viruses.
Essential oils are applied topically to the skin with a carrier oil or sometimes can be taken orally.Other times they are diffused in the air to be ingested.
Pure Essential oils are a simple way to keep things natural in your home or vehicle and still enjoy amazing scents.
If you are interested in learning more about the Essential oils that I love, here is a link for you! -Young Living Essential oils
(If you use this link and decide to purchase from young living I will make a small commission).
I hope that you enjoy making and using this as a way to enjoy different essential oils with a lovely scent in your car after a long day on your way home.
Pin this for Later!


I can’t wait to try this! I’ve been slowly working on switching to a nontoxic home. I don’t think I want to know what is in the normal store-bought air fresheners! Thank you so much for sharing!
I’m with you girl! Thank you! Let me know if you try them💕
What a cute idea! I love making hanging diffusers, and your use of the wool balls is so sweet.
Thanks so much!💕
This is a great idea and super cute! Thanks for sharing!
Thank you!!
These are adorable! Great idea!
Thank you💕
These are so cute! I love the step by step!
Thank you so much!
What a cute idea! And a much healthier option!
Thank you!!